Umbrella Print Registration Tolerance for Clean Branding Results
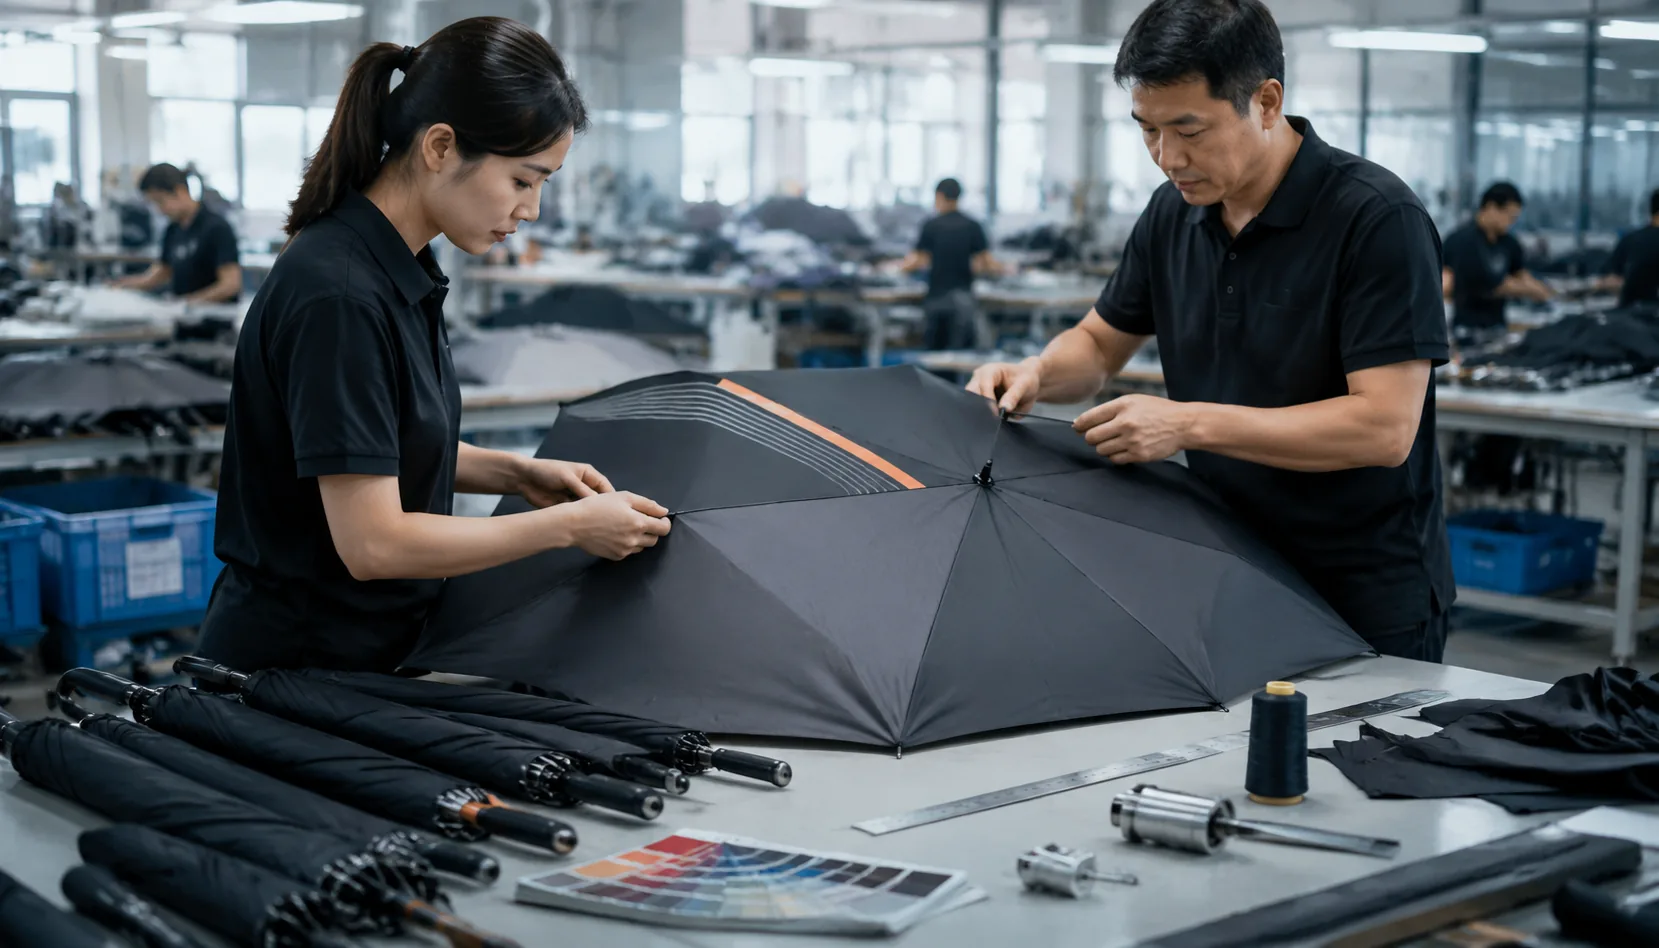
When a logo lands slightly off across umbrella panels, the whole order can look inconsistent, even if the artwork itself is correct. In production, clean branding depends on setting realistic umbrella print registration tolerance for curved panels, fabric stretch, seam placement, and the quick QC checks that catch drift before dozens of cartons are packed.
What registration tolerance means on an umbrella canopy
On an umbrella canopy, registration tolerance is the amount of logo or graphic shift you can accept before the print stops looking centered and intentional. In plain terms, it is the acceptable window for where the artwork lands relative to the panel edges, seams, and ribs. On flat goods you can hold a tighter target, but on an umbrella the surface is curved, the panels are narrow, and the fabric is under tension, so the same screen or transfer setup will behave differently from one panel to the next. That is why umbrella print registration tolerance has to be defined before production, not argued after the samples come back.
Curved panels create distortion because the artwork is laid onto a surface that changes shape when the canopy opens, and the seam lines interrupt the visual field. If the frame is windproof with fiberglass ribs, vents, or a double-canopy construction, the panel shape can move slightly more during sewing and finishing, which affects canopy print alignment. For that reason, buyers usually specify a practical panel print positioning window rather than a perfect mathematical center: many accept about 2 to 3 mm shift on small logos and up to 5 mm on larger all-over graphics, provided the print does not cross a seam or run into the stitch line.
The real control point is umbrella artwork setup and branded umbrella QC, not just the printer’s machine setting. You need a clear print bleed allowance, a marked panel template, and a decision on whether the logo is allowed to float visually with the panel curvature or must stay locked to a fixed seam reference. In my experience, buyers get the cleanest results when they define the acceptable edge variance up front, then inspect against that same rule at sampling and mass production, instead of expecting every canopy to match a flat-art proof exactly.
How panel count affects print alignment
An 8K umbrella gives you wider panels and a more forgiving branding field, so the umbrella print registration tolerance is usually easier to hold when you are running logos across multiple panels. On a typical 23" or 27" format, the print window sits farther from the seams, which helps keep canopy print alignment stable even if the sewing line drifts 2–3 mm. With 16K construction, each panel is narrower and the same artwork gets chopped into slimmer slices, so panel print positioning has to be tighter from the start. In practice, that means less room for artwork rotation, less room for seam shadow, and a smaller margin before the logo starts looking uneven from panel to panel.
Rib spacing changes the geometry more than most buyers expect. On 16K frames, the seams land closer together, so a full-panel logo loses usable width once you account for stitch margin, edge curl, and the print bleed allowance needed to avoid white slivers at the seam. If the umbrella uses steel ribs with a simple manual open mechanism, the fabric usually lays flatter at the head, which makes setup easier; auto-open and auto-open-close frames can introduce a little extra fabric tension near the tip and runner, so the usable branding zone can shift slightly when the canopy snaps open. That is why umbrella artwork setup has to be based on the exact frame pattern, not just the nominal canopy diameter.
For branded umbrella QC, we check the artwork against the sewn canopy, not against a flat template, because the seam line and rib peak are what the customer sees in the hand. ZheBrella’s standard practice is to approve a strike-off or digital placement proof first, then confirm the seam-to-logo relationship after sewing, especially on 16K windproof builds where the panel count compresses the print area fast. If the design relies on a centered mark or repeated panel graphics, I would specify the acceptable umbrella print registration tolerance in millimeters before production starts, otherwise the factory and the buyer may both call the result acceptable for different reasons.
Specify bleed, safe area, and seam avoidance
For umbrella artwork setup, treat `umbrella print registration tolerance` as a production limit, not a design excuse. On a clean panel print, I usually tell buyers to build in 3–5 mm of print bleed allowance on each side of the art and keep critical text or logos at least 8–10 mm inside the cut line. That gives room for panel trimming, fabric stretch, and minor sewing drift, especially when the canopy is opened under tension. If you want sharp branded umbrella QC, the file must be centered to the actual panel geometry, not the theoretical template, because small shifts become obvious once six or eight panels are stitched together.
Seam avoidance matters more than people expect. Do not place thin strokes, QR codes, or small type across a seam, along the tip reinforcement, or too close to the rib points, because the fabric folds and needle holes will distort the image. For canopy print alignment, the safest rule is to reserve a no-print zone of at least 5 mm along sewn edges and 10–12 mm around the tip cap area. In our shop, we check panel print positioning against the sewn panel, not just the flat cut piece, because registration that looks fine on paper can still fail after stitching and heat setting.
Pongee 190T and 210T behave differently in edge sharpness and ink coverage. On 190T, you get a slightly softer hand and a bit more visible fiber texture, so solids may need a heavier ink laydown to avoid speckling at the edges; on 210T, the weave is tighter and the print edge usually looks cleaner, with less fray at small type and finer line work. That said, 210T also shows registration errors more clearly, so a sloppy umbrella artwork setup gets punished faster. If the design has tight logos or color blocks, specify the fabric, print method, and tolerance together, because the same file can pass on one canopy and miss on another by a few millimeters.
Control print quality during sampling and bulk
The real control point is the first strike, not the last carton. For umbrella print registration tolerance, I look at the sample strike under the same folding and stretch conditions the production canopy will see, because a flat swatch can hide a bad mismatch at the seam. Check canopy print alignment against the centerline, panel print positioning at every seam break, and the print bleed allowance near stitch lines and edge folds; if the artwork is too tight, the design will drift as the fabric is tensioned over ribs. For branded umbrella QC, I also verify ink opacity on dark pongee 190T or 210T canopies, since a thin laydown may pass on white but fail on navy, black, or translucent POE.
First articles should be judged panel by panel, not as a whole umbrella from arm’s length. I want the artwork setup checked against the actual panel geometry, with the repeat, seam carryover, and logo centering measured before any mass run starts. Color density matters as much as registration: a logo can be perfectly placed and still look weak if the ink film is underbuilt or the cure is uneven, so I compare the strike against the approved Pantone target under daylight and shop light. If the sample shows drift beyond the agreed umbrella print registration tolerance, we stop and adjust the screen, transfer template, or digital file before releasing the lot.
In bulk production, I inspect print defects as part of AQL 2.5, not as a separate favor to the customer. That means sampling finished umbrellas for misregistration, ghosting, pinholes, smudging, missing ink, and seam-related distortion, then tracing failures back to one of three causes: bad panel cutting, poor fixture control, or artwork that ignored the canopy shape. A good mass run is boring: every lot should match the signed first article, with no visible shift at the rib points and no obvious density drop from panel one to panel eight. If the factory cannot hold that consistently, the print method or the umbrella artwork setup is wrong, and the lot should not ship.
Reduce risk with the right print method and order terms
Screen printing is the least forgiving when you have small logos crossing seams, zippers, or ribs, because every panel stretch shows up in the final canopy print alignment. If the artwork is simple and the run is large, screen is still the cheapest route, but the umbrella print registration tolerance has to be built into the artwork setup with wider keylines, fewer tight trap zones, and a realistic print bleed allowance. Digital printing gives you more freedom on gradients and short runs, but it does not magically fix poor panel print positioning; it only hides some of the setup pain. Transfer printing is usually the safest choice for small orders, odd placements, or when the logo must sit close to stitching, because the carrier film lets the printer control the image location better than wet ink on a curved panel.
For branded umbrella QC, I look at three things before release: whether the logo sits too close to panel edges, whether the panel size is stable after cutting, and whether the chosen method can hold registration after drying or heat curing. A 23" or 27" canopy with fiberglass ribs will move less than a loose POE panel, but every fabric still shifts differently depending on coating and heat. If the buyer wants tight multi-color registration, ask for a bigger safety zone in the artwork and approve a strike-off first; otherwise the accepted print bleed allowance should be explicit in the PO. That is the only way to keep the umbrella print registration tolerance from becoming a dispute after production.
MOQ and lead time matter because the more often you change art or panel layout, the more likely you are to miss the registration window on press. Small MOQ jobs are usually 7–12 days longer because they sit between bulk orders, while a standard repeat order can move faster if the umbrella artwork setup is already approved. Under FOB terms, the buyer usually owns the freight risk after handoff, but factory rework responsibility still depends on whether the defect came from approval, printing, or packing. Under DDP, delays hurt harder because the seller carries more of the shipment responsibility, so I put rework language, delay thresholds, and photo proof requirements into the order before production starts; otherwise a simple alignment issue can turn into a late-delivery argument instead of a QC fix.
Frequently Asked Questions
How much logo shift is acceptable on printed umbrellas?
It depends on the artwork and panel size, but buyers should define a maximum shift before sampling starts. The key is to set a measurable tolerance for each canopy zone rather than using a vague approval note.
Which canopy fabrics give the cleanest print edge?
Higher-quality pongee, especially 190T or 210T, usually gives a cleaner surface for logo edges than rougher fabrics. Final results still depend on ink type, curing, and how well the canopy is tensioned.
What print registration tolerance should a buyer allow for umbrella panels?
For most bulk umbrella orders, a practical tolerance is about 2 to 3 mm per panel for standard screen printing, with slightly wider variance possible on curved panels or larger canopies. If the logo spans multiple panels, ask for a pre-production sample and define the acceptable shift in the PO before production starts.
How much bleed should be added to umbrella artwork files?
A common starting point is 3 to 5 mm bleed beyond the trim or seam area, but the exact allowance depends on the canopy shape and print method. For all-over or panel-to-panel branding, the factory should confirm the final template so the artwork can compensate for seam distortion.
What QC checkpoints help prevent misaligned umbrella printing in bulk orders?
Key checkpoints include artwork approval on the factory template, first article inspection on the initial run, and mid-line checks every 30 to 50 pieces. For retail programs, it is also common to inspect panel-to-panel alignment, ink coverage, and logo centering before packing.
Looking to Launch Your Custom Umbrella Line?
ZheBrella is a Zhejiang-based OEM/ODM umbrella manufacturer with 17 years of export experience. Free design, low MOQ from 100 pieces, windproof construction, full-color print.
Get Free Quote Now »People Also Search For
Related Articles

Artwork Setup Rules for Clean Umbrella Branding Results
Get practical artwork setup rules for umbrellas, including bleed, panel alignment, safe zones, and production tolerances...
Read More »
Inside-Print Registration for Custom Umbrellas with Patterned Canopies
Learn how to align logos on patterned canopies, control panel registration, and set tolerances for sharp branded umbrell...
Read More »
Umbrella Artwork Setup: Panel Alignment, Bleed, and Color Tolerance
Avoid crooked logos and color mismatch by specifying panel count, seam-safe bleed, and Pantone tolerance before sampling...
Read More »