Umbrella Canopy Panel Cutting and Seam Alignment Controls
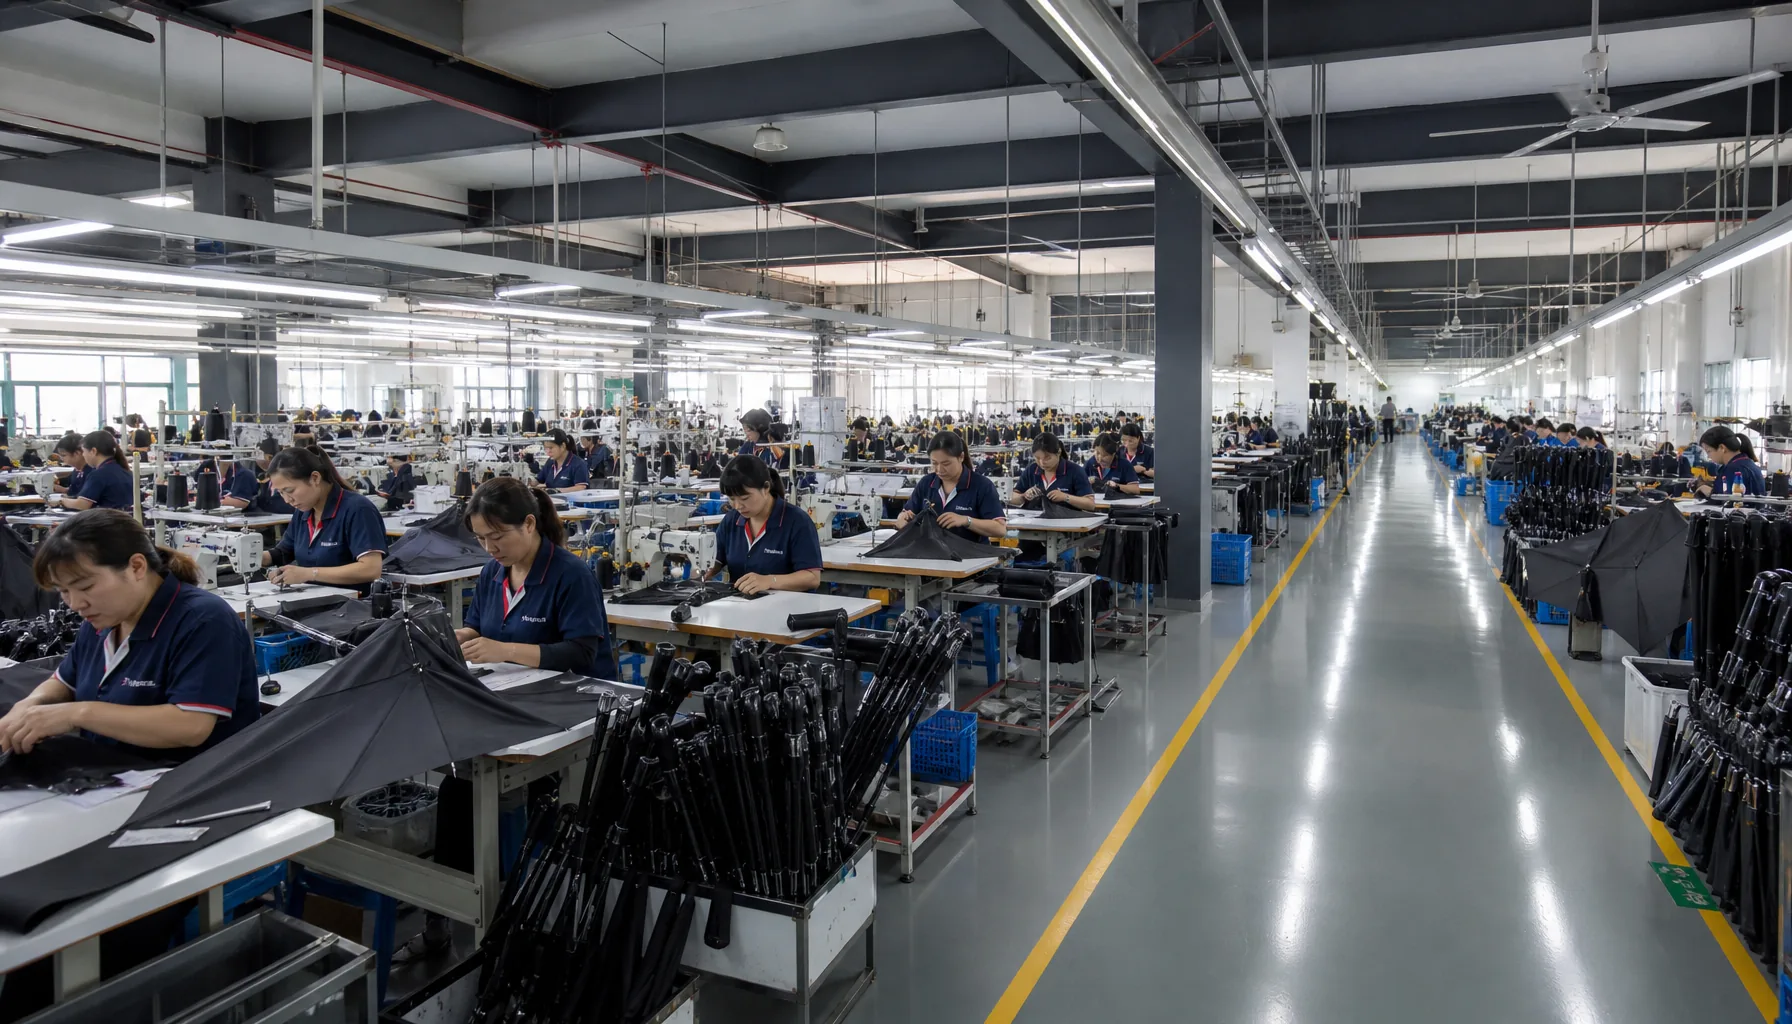
In umbrella production, a canopy can look fine on a sample table and still fail on the line if panel cutting, seam alignment, and stitch control drift by even a few millimeters. From the factory floor, the real issue is not just appearance but whether the panels meet cleanly, hold waterproof performance, and stay within umbrella canopy cutting tolerance without driving up rejects.
How panel geometry affects fit and rain performance
Panel geometry is the first thing that decides whether an umbrella opens cleanly or fights itself. If the panel shape is off, the canopy stops being a true cone and starts pulling unevenly at the ribs, which shows up as lopsided tension, twisted tips, and a crown that sits high on one side and low on the other. In practice, umbrella canopy cutting tolerance has to be tight enough that each panel lands in the same position after sewing, because a 2–3 mm drift at the hem becomes obvious at the stretcher points and at the top tip. That is why seam alignment umbrella production depends on the cut stage as much as the sewing stage; once the grain is wrong, the fabric will not behave symmetrically under load.
Grain direction matters because woven polyester, pongee 190T, and 210T all stretch differently on warp and weft. If panel pattern control is sloppy, the canopy will bias toward one direction when the frame opens, and that bias creates diagonal wrinkles that hold water instead of shedding it. The result is usually puckering near the seam line, a loose edge on one side, and a tighter opposite side that can shorten panel life. Good OEM umbrella canopy quality starts with cutting each panel so the grain follows the intended load path, especially on vented or double-canopy styles where airflow can expose any mismatch in the panel layout very quickly.
Poor layout also changes how rain moves across the surface. A canopy that is cut square but assembled with uneven panel angles will not drain evenly, so water pools along the flatter segments and drips at random points instead of running cleanly to the edge. During manufacturing inspection, we check panel symmetry, tip-to-tip spacing, and seam balance before bulk sewing, because once the panels are locked into the tape and stitching, small cutting errors become permanent shape defects. In real factory terms, the difference between a usable run and a rejection is often whether the cutting table, marker line, and die setup hold the umbrella canopy cutting tolerance consistently across all panels in the same lot.
Cutting methods for stable repeatability
Manual cutting is still common on low-volume umbrella orders, but it is the least stable method for repeatability. A skilled cutter can keep a reasonable umbrella canopy cutting tolerance on straight panels, yet the result depends on fabric tension, blade sharpness, and how well the cloth is laid out before the first cut. On 190T pongee and especially 210T pongee, the weave is tighter and the surface is slicker, so any drag from the knife can shift the panel edge by a few millimeters. That movement shows up later as panel mismatch, uneven hem width, or a crown that does not sit square during sewing.
Die cutting gives better panel pattern control when the layout is fixed and the same shape repeats across a long run. The blade pressure is consistent, so the panel edge is cleaner than hand cutting, but the method still has limits if the fabric relaxes after spreading or if the marker is not aligned with the warp and weft. In seam alignment umbrella production, the real issue is not just the cut edge; it is whether each panel lands at the same angle so the ribs and seams close without twist. For OEM umbrella canopy quality, die cutting works best on standard 8K or 10K shapes where throughput matters and the pattern does not change often.
Automated cutting is the best option when the order needs tighter registration and higher output, because the cutter follows digital marker data and reduces operator variation. It is the most reliable way to hold umbrella canopy cutting tolerance on 190T and 210T pongee, provided the feed is controlled and the lay is flattened before cutting. Slip is the hidden problem: if the cloth creeps under vacuum or shifts while stacking, the finished panel can grow longer on one side and shorter on the other, which throws off seam alignment at sewing. Our standard practice in manufacturing inspection is to check panel length, notch position, and matching pairs before stitching, because once the seam is sewn, a bad cut cannot be recovered later.
Seam alignment, stitch density, and needle control
The cut starts the quality problem, not the sewing machine. For an umbrella canopy, umbrella canopy cutting tolerance has to be tight enough that paired panels land on the same seam line after hemming and center-pointing; if the cut drifts, the stitch can only follow the mistake. In normal production I would keep panel-to-panel seam offset within about 1.5 to 2.0 mm on straight runs and hold the notch positions even tighter, because any larger error shows up as a spiral at the crown or a stepped hem when the canopy is opened. That is why panel pattern control matters before sewing starts: if the printed or die-cut mark is off, seam alignment umbrella production becomes a rework job instead of a controlled operation.
Thread tension and seam overlap decide whether the canopy lies flat or twists under load. On 190T or 210T pongee, I want enough seam overlap for bite but not so much that the edge bulk creates a ridge; for most OEM umbrella canopy quality work, 3 to 4 mm of clean overlap is enough when the needle is centered and the feed is stable. Topstitch consistency should stay uniform from panel one to panel eight or sixteen, with stitch spacing usually held around 3.0 to 3.5 mm and no visible wavering at the tip curve. If the tension is too loose, the seam tunnels; if it is too tight, the edge puckers and the bias stretch pulls the panel out of shape.
Misaligned seams are easy to miss on the table and obvious after canopy stretching. Once the frame opens fully, a bad cut or uneven stitch density shows up as panel twisting, uneven rain runoff lines, and a crown that does not sit centered over the shaft. In manufacturing inspection, I check the open-canopy silhouette first, then the seam landing points at the ribs and the hem, because that is where a small needle or cutter error becomes visible. For OEM umbrella canopy quality, the practical rule is simple: if the seam cannot survive a full-open visual check without a shadow line, offset, or roping effect, it is not ready for packing.
Panel count, vent geometry, and symmetry checks
Panel count changes the whole cutting conversation. An 8K umbrella can often tolerate a small amount of drift because each panel is wider, but a 10K or 16K frame narrows every panel and exposes even a 1–2 mm error at the hem, tip, or ferrule end. That is where umbrella canopy cutting tolerance stops being a paper spec and becomes a real assembly problem: the stitcher can force a panel into place, but the centerline will wander, the crown will pull, and the canopy will not sit cleanly on the ribs. Higher panel counts also add assembly time because operators spend more minutes matching notches, checking grain direction, and correcting bundle-to-bundle variation before sewing starts.
For seam alignment umbrella production, the first control point is the pattern, not the sewing machine. We use panel pattern control to lock the apex angle, rib length allowance, and hem offset before cutting, then confirm that left and right halves mirror within the same batch. On OEM umbrella canopy quality work, I care more about repeatability across 500 pieces than a single perfect sample, so manufacturing inspection has to check panel width, curvature, and seam jog at several points, not just the finished diameter. If the cut table is drifting or the marker is scaled wrong, the error multiplies fast on 10K and 16K styles because every panel carries the same bias into the stitched dome.
Vented and double-canopy constructions are where small mistakes become obvious. A single-layer canopy can hide a minor offset, but a double-canopy windproof build stacks two cut sets, two seam paths, and usually a vent opening that must land exactly over the same rotational index on both layers. If the outer and inner panels are not indexed tightly, the vent edge twists, the vent gap becomes uneven, and the umbrella looks crooked even when the frame is square. In practice, I treat these styles as a stricter umbrella canopy cutting tolerance job: confirm panel count, mark the vent reference points, and verify symmetry before sewing, then recheck after the first three units because the same misalignment will repeat across the whole lot.
Inspection points before packing and shipment
Before packing, the first control is visual seam wandering against the panel template, because once a canopy is sewn, a small shift at the edge becomes obvious when the umbrella opens. On production runs we treat umbrella canopy cutting tolerance as a measurable check, not a vague judgment: panel width, arc length, and notch positions need to stay consistent so the seam line sits where the pattern expects it. Tip placement has to land cleanly at the apex, edge fray should be trimmed or rejected, and the sewing line must not snake across the panel. In seam alignment umbrella production, the real issue is whether the canopy still opens flat and tension is even; cosmetic drift is acceptable only if it does not distort the panel shape or expose raw edge.
Print registration needs the same discipline as the cut itself, especially on logo umbrellas or full-panel graphics. If the print crosses a seam, the artwork should be centered to the panel pattern control points before sewing, otherwise the image will jump when the fabric is pulled into shape. For OEM umbrella canopy quality, buyers should define cosmetic defects separately from functional ones: a light ink shift, minor thread tail, or small fold mark may be reworkable, while broken stitches, exposed fray at the seam, loose tip reinforcement, or a canopy that twists on opening is functional failure. In manufacturing inspection, those categories should be written into the PO so the line knows what can be repaired and what must be scrapped or downgraded.
Final release should use AQL 2.5 sampling on the packed lot, with the sample plan tied to the order size and defect severity. Minor cosmetic misses can usually go to trimming, steaming, or local resewing if the defect rate stays below the buyer’s rework threshold; once the same issue repeats across multiple sampled units, it is a process problem, not an isolated mistake. Buyers should state the rework limit in advance, for example zero tolerance for seam blowout, tip pullout, and print misregistration that crosses the trim line, but a limited allowance for loose threads or slight shade variation. That keeps inspection consistent and prevents arguments after shipment.
Frequently Asked Questions
Why do canopy seams shift after sewing even when the cut panels look correct?
Fabric stretch, feed pressure, and thread tension can pull the seam off line during stitching. This is especially noticeable on lightweight pongee and on long panels with tight curvature.
What is the most useful buyer spec for canopy accuracy?
Ask for a panel pattern drawing with allowable seam offset, edge tolerance, and tip-position limits. That gives the factory a measurable target and reduces disputes during PP approval and inspection.
What seam alignment tolerance is typically acceptable for a standard promotional umbrella canopy?
For most OEM promotional umbrellas, buyers commonly approve seam offset within 2-3 mm at visible panel joins. Premium retail programs may tighten this to 1.5-2 mm, especially on striped, color-blocked, or logo-critical canopies.
At which production stage should canopy panel measurements be checked to reduce bulk rework?
The most effective control point is immediately after cutting, before bundling panels to sewing lines. Many factories also recheck the first 5-10 sewn canopies per style to confirm that cutting, seam allowance, and stitch tension are holding the target shape.
Can tighter stitch density improve waterproofing on umbrella canopy seams?
Not always. Higher stitch density can strengthen seam appearance, but too many needle holes may increase water penetration risk on lightweight polyester or pongee; a balanced setting such as 8-10 stitches per inch is often used, then verified with a spray or light rain test.
Looking to Launch Your Custom Umbrella Line?
ZheBrella is a Zhejiang-based OEM/ODM umbrella manufacturer with 17 years of export experience. Free design, low MOQ from 100 pieces, windproof construction, full-color print.
Get Free Quote Now »People Also Search For
Related Articles
Umbrella Panel Cutting and Sewing: Print Alignment Tolerances
Understand how cutting, sewing, and frame assembly affect logo alignment, panel matching, and inspection tolerances in c...
Read More »
Umbrella Canopy Panel Cutting Tolerances for OEM Production
Learn how panel cutting tolerances, fabric relaxation, and die control affect canopy fit, print alignment, leak risk, an...
Read More »
Umbrella Canopy Cutting Tolerances for Consistent Production
See how panel cutting tolerance, fabric shrinkage, and marker layout affect canopy fit, print alignment, and rework in O...
Read More »